
겉바속촉
[spring] 사이트 만들기 본문
게시판을 하나 또 만들어볼게요:)
다음과 같이 표시해준 대로 필요한 것들 생성해볼까유

info.data 패키지 작성 후
InfoDao
InfoDaoInter(인터페이스)
InfoDto
3가지 생성해주기

webapp에서 index.jsp 만들어 주세요:)
그리고 deftiles, image, info 폴더 생성
다음 코드를 템플릿으로 만들어버렸습니다.
<%@ page language="java" contentType="text/html; charset=utf-8"
    pageEncoding="utf-8"%>
<%@taglib prefix="c" uri="http://java.sun.com/jsp/jstl/core"  %>
<%@taglib prefix="fmt" uri="http://java.sun.com/jsp/jstl/fmt" %>
<%@taglib prefix="tiles" uri="http://tiles.apache.org/tags-tiles" %>

<!DOCTYPE html>
<html>
<head>
<c:set var="path" value="<%=request.getContextPath() %>"></c:set>
<meta charset="utf-8">
 <script src="https://code.jquery.com/jquery-3.5.1.js"></script>
<link rel="stylesheet" href="https://maxcdn.bootstrapcdn.com/bootstrap/3.3.2/css/bootstrap.min.css">
<title>Insert title here</title>
</head>
<body>

</body>
</html>
그리고 다음과 같이 더 추가로 만들어주세요

layout폴더에다가
body
bottom
top
menu
layout1
5개 파일 생성해주기
menu.jsp
<%@ page language="java" contentType="text/html; charset=utf-8"
    pageEncoding="utf-8"%>
<%@taglib prefix="c" uri="http://java.sun.com/jsp/jstl/core"  %>
<%@taglib prefix="fmt" uri="http://java.sun.com/jsp/jstl/fmt" %>
<%@taglib prefix="tiles" uri="http://tiles.apache.org/tags-tiles" %>

<!DOCTYPE html>
<html>
<head>
<c:set var="path" value="<%=request.getContextPath() %>"></c:set>
<meta charset="utf-8">
 <script src="https://code.jquery.com/jquery-3.5.1.js"></script>
<link rel="stylesheet" href="https://maxcdn.bootstrapcdn.com/bootstrap/3.3.2/css/bootstrap.min.css">
<title>Insert title here</title>
</head>
<body>
<a href="${path }/home">Home</a>
<a href="${path }/info/inserform">MyInfo입력폼</a>
<a href="${path }/info/list">MyInfo_목록</a>
</body>
</html>
top,body,bottom 에 사이트를 꾸며줄 이미지들 복붙해서 넣어주세요
다음과 같은 형식으로 넣어주시면 됩니다:)
<body>
<img alt="" src="${path }/image/header.png">
</body>
그리고 layout1.jsp 작성해주세요
컴파일 해보시면서 left, top, width, height들은 계속 수정해주시면 okay
<%@ page language="java" contentType="text/html; charset=utf-8"
    pageEncoding="utf-8"%>
<%@taglib prefix="c" uri="http://java.sun.com/jsp/jstl/core" %>
<%@taglib prefix="fmt" uri="http://java.sun.com/jsp/jstl/fmt" %>
<%@taglib prefix="tiles" uri="http://tiles.apache.org/tags-tiles" %>
<!DOCTYPE html>
<html>
<head>
<c:set var="path" value="<%=request.getContextPath() %>"></c:set>
<meta charset="utf-8">
<script src="https://code.jquery.com/jquery-3.5.1.js"></script>
<link rel="stylesheet" href="https://maxcdn.bootstrapcdn.com/bootstrap/3.3.2/css/bootstrap.min.css">
<style type="text/css">
  #top{  /* id가 top인 */
  	position: absolute; left: 200px; top: 10px; width: 1000px; height: 50px;
  	text-align: center;
  }

  #menu{
  	position: absolute; left: 500px; top: 150px; width: 700px; height: 70px;
  	text-align: center;
  }

  #body{
    position: absolute; left: 300px; top: 200px; width: 1200px; height: 500px;
    padding-left: 200px;

  }

  #bottom{
    position: absolute; left: 300px; top: 900px; width: 700px; height: 80px;
    text-align: center;
  }
</style>
<title>Insert title here</title>
</head>
<body>
<div id="top">
  <tiles:insertAttribute name="header"/>
</div>

<div id="menu">
  <tiles:insertAttribute name="menu"/>
</div>

<div id="body">
  <tiles:insertAttribute name="body"/>
</div>

<div id="bottom">
  <tiles:insertAttribute name="bottom"/>
</div>
</body>
</html>
servlet-context.xml에서 다음과 같이 수정해주세요:)

그리고 다음 표시 부분을 주석처리해주신 후에 아래에다가
코드 추가해주세요:)

	<!-- tiles Resolver -->
 <beans:bean id="tilesConfigurer" class="org.springframework.web.servlet.view.tiles3.TilesConfigurer">
   <beans:property name="definitions">
     <beans:list>
        <beans:value>/WEB-INF/deftiles/tiles.xml</beans:value>
     </beans:list>
   </beans:property>
   <beans:property name="preparerFactoryClass"
   value="org.springframework.web.servlet.view.tiles3.SpringBeanPreparerFactory"/>
 </beans:bean>

 <beans:bean id="viewResolver" class="org.springframework.web.servlet.view.UrlBasedViewResolver">
   <beans:property name="viewClass" value="org.springframework.web.servlet.view.tiles3.TilesView"/>
 </beans:bean>
servlet-context.xml 전체코드
<?xml version="1.0" encoding="UTF-8"?>
<beans:beans xmlns="http://www.springframework.org/schema/mvc"
	xmlns:xsi="http://www.w3.org/2001/XMLSchema-instance"
	xmlns:beans="http://www.springframework.org/schema/beans"
	xmlns:context="http://www.springframework.org/schema/context"
	xsi:schemaLocation="http://www.springframework.org/schema/mvc https://www.springframework.org/schema/mvc/spring-mvc.xsd
		http://www.springframework.org/schema/beans https://www.springframework.org/schema/beans/spring-beans.xsd
		http://www.springframework.org/schema/context https://www.springframework.org/schema/context/spring-context.xsd">

	<!-- DispatcherServlet Context: defines this servlet's request-processing infrastructure -->

	<!-- Enables the Spring MVC @Controller programming model -->
	<annotation-driven />

	<!-- Handles HTTP GET requests for /resources/** by efficiently serving up static resources in the ${webappRoot}/resources directory -->
	<resources mapping="/resources/**" location="/WEB-INF/image/" />

	<!-- Resolves views selected for rendering by @Controllers to .jsp resources in the /WEB-INF/views directory -->
	<!-- <beans:bean class="org.springframework.web.servlet.view.InternalResourceViewResolver">
		<beans:property name="prefix" value="/WEB-INF/views/" />
		<beans:property name="suffix" value=".jsp" />
	</beans:bean> -->

	<!-- tiles Resolver -->
 <beans:bean id="tilesConfigurer" class="org.springframework.web.servlet.view.tiles3.TilesConfigurer">
   <beans:property name="definitions">
     <beans:list>
        <beans:value>/WEB-INF/deftiles/tiles.xml</beans:value>
     </beans:list>
   </beans:property>
   <beans:property name="preparerFactoryClass"
   value="org.springframework.web.servlet.view.tiles3.SpringBeanPreparerFactory"/>
 </beans:bean>

 <beans:bean id="viewResolver" class="org.springframework.web.servlet.view.UrlBasedViewResolver">
   <beans:property name="viewClass" value="org.springframework.web.servlet.view.tiles3.TilesView"/>
 </beans:bean>


	<context:component-scan base-package="spring.mvc.board, *.data" />


</beans:beans>
tiles.xml에다가 다음 코드 복붙해주기
<!DOCTYPE tiles-definitions PUBLIC
"-//Apache Software Foundation//DTD Tiles Configuration 3.0//EN"
"http://tiles.apache.org/dtds/tiles-config_3_0.dtd">
그리고 다음과 같이 작성해주실게요
<?xml version="1.0" encoding="UTF-8"?>
<!DOCTYPE tiles-definitions PUBLIC
"-//Apache Software Foundation//DTD Tiles Configuration 3.0//EN"
"http://tiles.apache.org/dtds/tiles-config_3_0.dtd">
<tiles-definitions>
	<definition name="templayout1" template="/WEB-INF/layout/layout1.jsp">
		<put-attribute name="header" value="/WEB-INF/layout/top.jsp"/>
		<put-attribute name="body" value="/WEB-INF/layout/body.jsp"/>
		<put-attribute name="bottom" value="/WEB-INF/layout/bottom.jsp"/>
		<put-attribute name="menu" value="/WEB-INF/layout/menu.jsp"/>
	</definition>


	<!-- 요기에 하나하나 매핑주소 설정 -->
	<definition name="home.tiles" extends="templayout1">
		<put-attribute name="body" value="/WEB-INF/layout/body.jsp"/>
	</definition>
	<definition name="list.tiles" extends="templayout1">
		<put-attribute name="body" value="/WEB-INF/layout/list.jsp"/>
	</definition>
	<definition name="input.tiles" extends="templayout1">
		<put-attribute name="body" value="/WEB-INF/layout/inputForm.jsp"/>
	</definition>

</tiles-definitions>
tiles.xml에서 다음과 같이 와일드카드를 만들어주었습니다:)

그렇다면 HomeController로 가셔서
return "list.tiles"가 아닌 return "/info/list" 라고 해주셔야겠쥬?


HomeController.java
package spring.mvc.board;

import java.text.DateFormat;
import java.util.Date;
import java.util.Locale;

import org.slf4j.Logger;
import org.slf4j.LoggerFactory;
import org.springframework.stereotype.Controller;
import org.springframework.ui.Model;
import org.springframework.web.bind.annotation.GetMapping;
import org.springframework.web.bind.annotation.RequestMapping;
import org.springframework.web.bind.annotation.RequestMethod;

/**
 * Handles requests for the application home page.
 */
@Controller
public class HomeController {

	/*
	 * private static final Logger logger =
	 * LoggerFactory.getLogger(HomeController.class);
	 */
	/**
	 * Simply selects the home view to render by returning its name.
	 */

	//index에서 설정한 매핑주소 home
	@RequestMapping(value = "/home", method = RequestMethod.GET)
	public String mainview() {

		return "home.tiles"; //jsp주소를 tiles의 value값으로 설정
	}

	//메뉴 에서 설정한 매핑주소
	@GetMapping("/info/list")
	public String listview() {

		//return "list.tiles"; //jsp주소를 tiles의 value값으로 설정
		return "/info/list";
	}

	@GetMapping("/info/insertform")
	public String inputform() {
		//return "input.tiles";
		return "/info/inputForm";

	}

}
그리고
db창으로 가셔서 table생성해주신 후에 값 하나 넣어주세요:)

자 그럼 dto로 가셔서 num, name, addr 변수 선언해주세요
그리고 getter, setter 자동생성해주기!!
InfoDto.java
package info.data;

public class InfoDto {

	private int num;
	private String name,addr;
	public int getNum() {
		return num;
	}
	public void setNum(int num) {
		this.num = num;
	}
	public String getName() {
		return name;
	}
	public void setName(String name) {
		this.name = name;
	}
	public String getAddr() {
		return addr;
	}
	public void setAddr(String addr) {
		this.addr = addr;
	}


}
그러면 우리가 작성한 db의 값들을 list로 받아옵시다
daointer로 가셔서 작성해주셔야겠쥬?
InfoDaoInter.java
package info.data;

import java.util.List;

public interface InfoDaoInter {

	public List<InfoDto> getAllDatas();


}
그리고
xml파일들 다음과 같이 세팅 후에 시작할게요:)
InfoSql.xml
<?xml version="1.0" encoding="UTF-8"?>
<!DOCTYPE mapper
PUBLIC "-//mybatis.org//DTD Mapper 3.0//EN"
"http://mybatis.org/dtd/mybatis-3-mapper.dtd">
SqlMapConfig.xml
<?xml version="1.0" encoding="UTF-8"?>
<!DOCTYPE configuration PUBLIC "-//mybatis.org//DTDConfig 3.0//EN" "HTTP://mybatis.org/dtd/mybatis-3-config.dtd">
다 하셨으면
InfoSql.xml로 가셔서 추가 작성해보도록 할게요:)
<?xml version="1.0" encoding="UTF-8"?>
<!DOCTYPE mapper
PUBLIC "-//mybatis.org//DTD Mapper 3.0//EN"
"http://mybatis.org/dtd/mybatis-3-mapper.dtd">
<mapper namespace="info">
	<select id="selectAllDatasOfInfo" resultMap="idto">
		select * from myinfo order by num asc
	</select>

</mapper>
SqlMapConfig.xml
<?xml version="1.0" encoding="UTF-8"?>
<!DOCTYPE configuration PUBLIC "-//mybatis.org//DTDConfig 3.0//EN" "HTTP://mybatis.org/dtd/mybatis-3-config.dtd">
<configuration>
	<typeAliases>
		<typeAlias type="info.data.InfoDto" alias="idto"/>
	</typeAliases>

	<mappers>
		<mapper resource="mybatis/setting/InfoSql.xml"/>
	</mappers>

</configuration>
InfoDao.java
InfoDao에 떠있는 빨간줄에 마우스를 올리고 나서 add...해주신 후에 작성해주세요:)
package info.data;

import java.util.List;

import org.mybatis.spring.support.SqlSessionDaoSupport;
import org.springframework.stereotype.Repository;

@Repository
public class InfoDao extends SqlSessionDaoSupport implements InfoDaoInter {

	@Override
	public List<InfoDto> getAllDatas() {
		// TODO Auto-generated method stub
		return getSqlSession().selectList("selectAllDatasOfInfo");
	}

}
그리고 WEB-INF에다가 db.properties 파일을 추가로 생성했습니다
db.properties

다음과 같이 driver랑 url은 db창 가서 properties에서 복붙해와주시구요
계정과 패스워드도 넣어주세요:)
driver=oracle.jdbc.driver.OracleDriver
url=jdbc:oracle:thin:@localhost:1521:XE
username=gutba
password=sokchock
root-context.xml 코드도 다음과 같이 해주세요:)
<?xml version="1.0" encoding="UTF-8"?>
<beans xmlns="http://www.springframework.org/schema/beans"
	xmlns:xsi="http://www.w3.org/2001/XMLSchema-instance"
	xsi:schemaLocation="http://www.springframework.org/schema/beans https://www.springframework.org/schema/beans/spring-beans.xsd">

	<!-- Root Context: defines shared resources visible to all other web components -->
	<!-- Root Context: defines shared resources visible to all other web components -->
 <bean
 class="org.springframework.beans.factory.config.PropertyPlaceholderConfigurer">
  <property name="locations">
   <value>WEB-INF/db.properties</value>
  </property>
 </bean>

 <!-- dataSource -->
 <bean id="dataSource"
   class="org.apache.commons.dbcp.BasicDataSource">
  <property name="url" value="${url}"/>
  <property name="driverClassName" value="${driver}"/>
  <property name="username" value="${username}"/>
  <property name="password" value="${password}"/>
 </bean>

 <bean id="sqlSessionFactory"
 class="org.mybatis.spring.SqlSessionFactoryBean">
  <property name="dataSource" ref="dataSource"/>
  <property name="configLocation">
   <value>classpath:mybatis/setting/SqlMapConfig.xml</value>
  </property>
 </bean>

 <bean id="sqlSessionTemplate"
   class="org.mybatis.spring.SqlSessionTemplate">
  <constructor-arg ref="sqlSessionFactory"/>
 </bean>

</beans>
그리고
HomeController로 가셔서 다음과 같이 작성해주세요:)
package spring.mvc.board;

import java.text.DateFormat;
import java.util.Date;
import java.util.List;
import java.util.Locale;

import org.slf4j.Logger;
import org.slf4j.LoggerFactory;
import org.springframework.beans.factory.annotation.Autowired;
import org.springframework.stereotype.Controller;
import org.springframework.ui.Model;
import org.springframework.web.bind.annotation.GetMapping;
import org.springframework.web.bind.annotation.RequestMapping;
import org.springframework.web.bind.annotation.RequestMethod;
import org.springframework.web.servlet.ModelAndView;

import info.data.InfoDaoInter;
import info.data.InfoDto;

/**
 * Handles requests for the application home page.
 */
@Controller
public class HomeController {

	@Autowired
	private InfoDaoInter dao;


	//index에서 설정한 매핑주소 home
	@RequestMapping(value = "/home", method = RequestMethod.GET)
	public String mainview() {

		return "home.tiles"; //jsp주소를 tiles의 value값으로 설정
	}

	//메뉴 에서 설정한 매핑주소
	@GetMapping("/info/list")
	/*
	 * public String listview() {
	 *
	 * //return "list.tiles"; //jsp주소를 tiles의 value값으로 설정 return "/info/list"; }
	 */
	public ModelAndView list()
	{
		ModelAndView model=new ModelAndView();
		List<InfoDto>list=dao.getAllDatas();
		model.addObject("list", list);
		model.setViewName("/info/list"); //타일즈 세팅
		return model;
	}


	@GetMapping("/info/insertform")
	public String inputform() {
		//return "input.tiles";
		return "/info/inputForm";

	}

}
list.jsp로 가서 다음과 같이 작성해주세요~
<%@ page language="java" contentType="text/html; charset=utf-8"
    pageEncoding="utf-8"%>
<%@taglib prefix="c" uri="http://java.sun.com/jsp/jstl/core"  %>
<%@taglib prefix="fmt" uri="http://java.sun.com/jsp/jstl/fmt" %>
<%@taglib prefix="tiles" uri="http://tiles.apache.org/tags-tiles" %>

<!DOCTYPE html>
<html>
<head>
<meta charset="utf-8">
 <script src="https://code.jquery.com/jquery-3.5.1.js"></script>
<link rel="stylesheet" href="https://maxcdn.bootstrapcdn.com/bootstrap/3.3.2/css/bootstrap.min.css">
<title>Insert title here</title>
</head>
<body>
<a href="insertform">데이터 추가</a><br><br>
<hr>
<table class="table table-striped" style="width: 400px;">
	<tr>
		<th>번호</th>
		<th>이름</th>
		<th>주소</th>
		<th>편집</th>
	</tr>
</table>
</body>
</html>
이제 실행시켜보도록 할게요:)
Home 클릭

Myinfo입력폼 클릭

MyInfo_목록 클릭
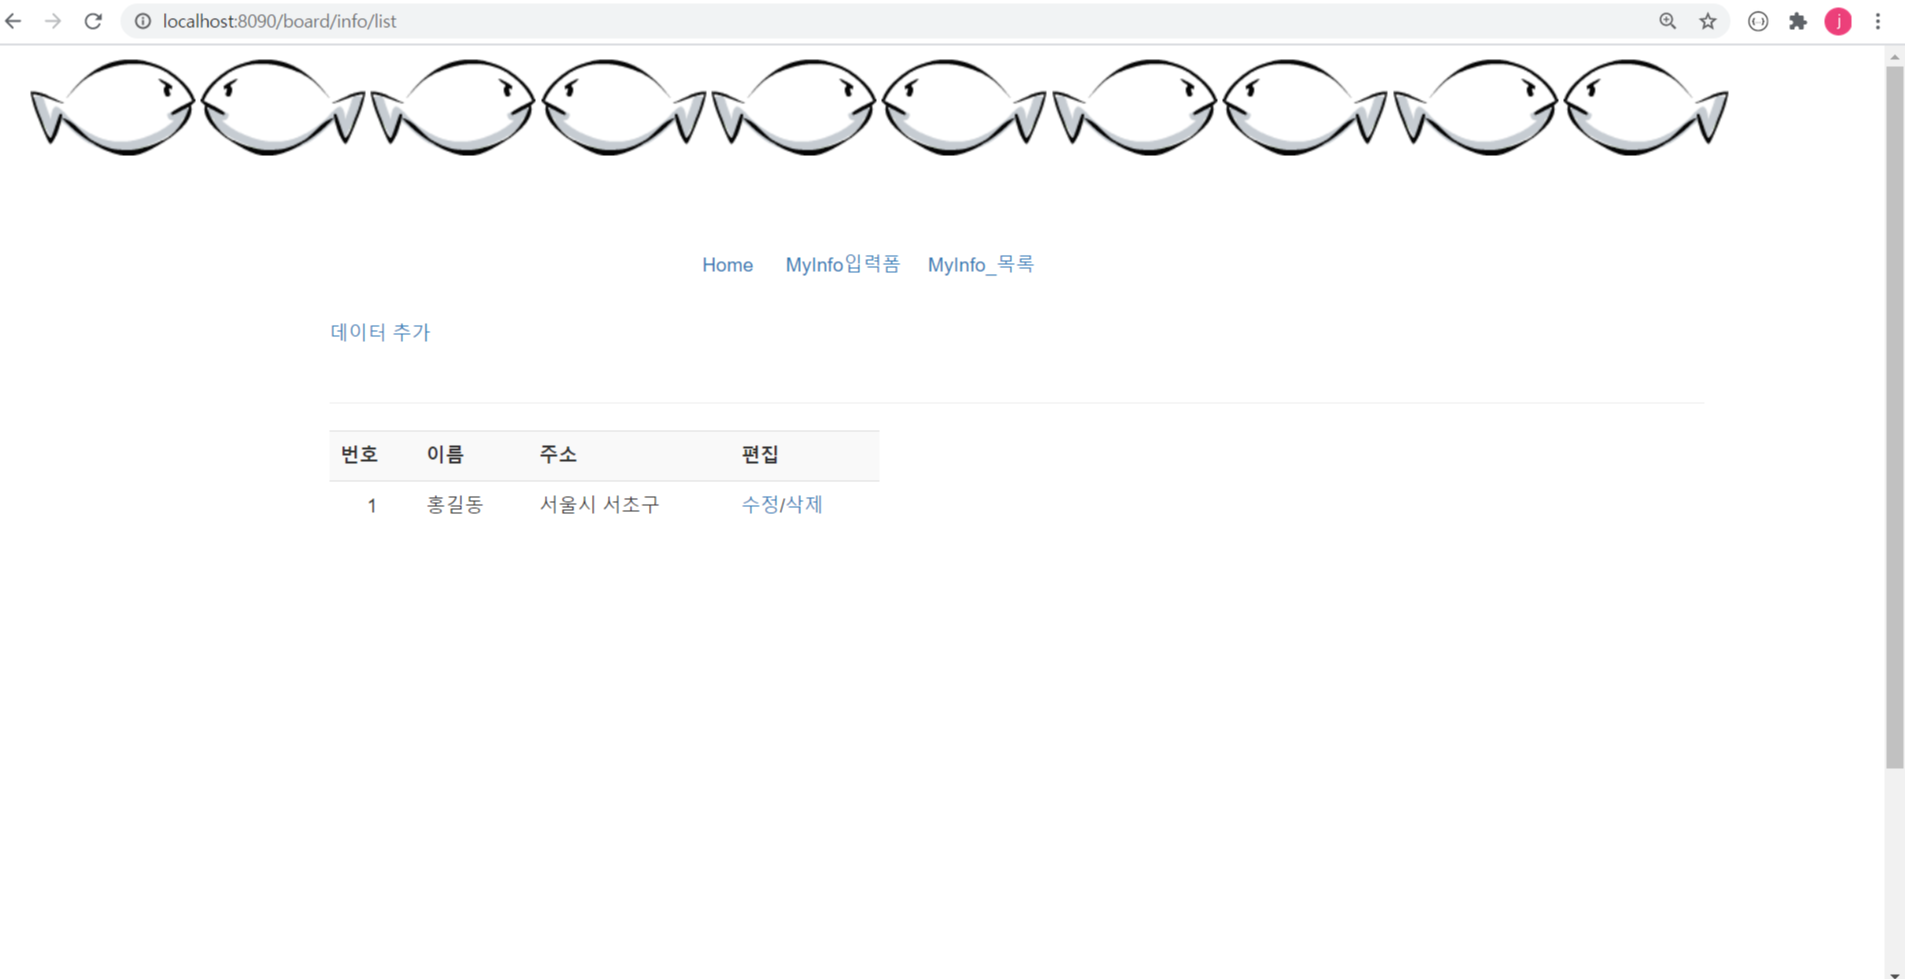
겉바속촉은 테스트용으로 폼과 리스트를 써놨는 데
모두 잘 뜨고 있군요!!!
그럼 다음 포스팅에서 마저 작업해보도록 하겠습니다!^^!
'IT일기(하반기) > SPRING' 카테고리의 다른 글
| [spring] 로그인 만들어주기 (0) | 2020.07.07 |
|---|---|
| [spring] 제발 외우기 (0) | 2020.07.07 |
| [spring] 게시판 만들기 upload (0) | 2020.07.02 |
| [spring] Upload 프로젝트 생성 후 세팅해주기 (4) | 2020.07.02 |
| [spring] 입출력 연습하기 (0) | 2020.07.02 |


